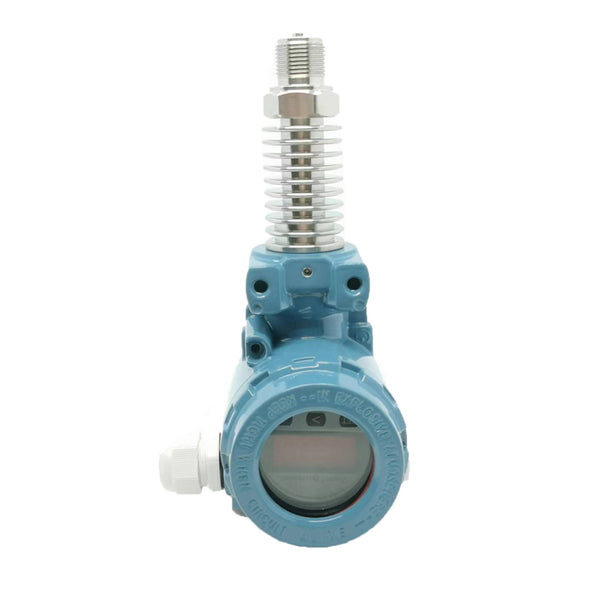
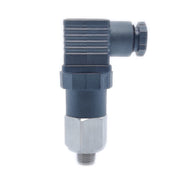
A differential pressure transmitter is a nifty tool that measures pressure differences in air or liquids in various systems. It's like a measuring tape for pressure, telling us how much more force exists at one point compared to another. To install one, you need to find the right spots in your system, attach the pressure lines, secure the transmitter, and make sure the wiring is correct. Think of it as setting up a new appliance. With some basic tools and careful steps, you can get this gadget up and running, ensuring your systems work smoothly and safely!
What is a differential pressure transmitter?
A differential pressure transmitter is a clever device that measures the difference in pressure between two points. Imagine you have two balloons, one big and one small. This transmitter can tell how much more air is in one balloon compared to the other. It's super useful in systems where this pressure difference matters a lot, like in heating, ventilation, and air conditioning systems. This helps to make sure everything runs smoothly and efficiently.
What is the purpose of the differential pressure transmitter?
A differential pressure transmitter is a really useful tool that has a bunch of important jobs. It’s like a detective that figures out the difference in pressure between two spaces. This can tell us a lot about what’s going on inside pipes and systems where you can't see inside.
For example, let's think about air conditioning in a big building. The transmitter can check if the air moves properly from one room to another. If one room is under too much pressure and another is not enough, the transmitter lets us know. It's essential for comfort and for the system to work right.
In industries, these transmitters have a huge role. They keep an eye on filters, like in a water treatment plant. They can tell when a filter gets dirty because the pressure drops. This means it's time to clean or replace the filter. It helps the plant keep running without any big stops or problems.
These transmitters also help in safety. In places like chemical plants, pressure needs to stay just right. Too much pressure could mean a leak or a blockage, which could be dangerous. The transmitter acts like a watchdog. It barks (or signals) when something goes wrong, keeping everyone safe.
And think about making medicines. Everything needs to be super precise. The differential pressure transmitter ensures the pressure is perfect for making high-quality medicine safely. It's like a baker measuring ingredients to get a cake just right.

How to install differential pressure transmitter?
Installing a differential pressure transmitter can seem tricky, but don't worry! I'll walk you through it step by step. Just like following a recipe, we'll go from getting our ingredients together to enjoying our finished product.
Step 1: Gather Your Tools and Materials
Before you start, make sure you have the transmitter, some wrenches, screwdrivers, and the manual. It's like getting ready to bake cookies – you want all your ingredients on the counter.
Step 2: Know Your Pressure Points
You need to find the two points where you'll measure pressure. It's like deciding where to put the ears on a teddy bear.
Step 3: Turn Off the System
Safety first! Make sure you turn off the system where you'll install the transmitter. It's like turning off the oven before you put your hand in it.
Step 4: Install the Mounting Bracket
Now, put up the bracket where the transmitter will sit. It's like setting up a little shelf for a plant.
Step 5: Connect the Pressure Lines
Attach the high-pressure line to the high-pressure side of the transmitter, and the low-pressure line to the low-pressure side. Think of it like hooking up a garden hose.
Step 6: Secure the Transmitter
Mount the transmitter onto the bracket you've installed. Make sure it's tight and secure. You wouldn't want your plant falling off the shelf!
Step 7: Check the Wiring
Follow the manual to connect the electrical wiring. It's important to get this right – like making sure your TV is plugged in to watch your favorite show.
Step 8: Apply Power to the Transmitter
Turn on the power slowly and watch the transmitter come to life. It's a bit like waking up your phone with a button press.
Step 9: Calibrate the Transmitter
Adjust the transmitter using the screws or software it comes with. You're telling it what's normal, kind of like setting a watch.
Step 10: Test the Transmitter
With everything in place, it's time to test. Turn your system back on and watch the transmitter do its job. It should show the pressure difference between the two points.
Step 11: Final Check
Give everything one last look to make sure it's all snug and correct. It's like double-checking that your doors are locked before you leave the house.
Step 12: Document the Installation
Write down what you did, just in case you need to remember later. It's like taking a photo of your cookies to remember how good they looked.
And there you go! You've just installed a differential pressure transmitter. Remember to always follow the specific instructions for your model and consult with a professional if you're unsure about any steps. Just like in cooking, sometimes following the recipe to the letter is the best way to ensure a great result.
FAQs
What does a differential pressure transmitter do?
Think of a differential pressure transmitter as a smart little helper that keeps track of pressure in pipes or between rooms. It measures how much more pressure is in one spot compared to another. This info helps to control and monitor systems like air conditioning or water flowing through pipes to keep them running just right.
Can I put a differential pressure transmitter in any system?
Yes, you can use these transmitters in many places, from HVAC systems in buildings to checking water levels in tanks. They are versatile! Just make sure you choose the right one for your system's pressure range and the type of fluid you’re working with.
How often should I check my differential pressure transmitter for accuracy?
It's a good idea to check your transmitter regularly, maybe once a year, to make sure it's still accurate. It's like getting a check-up for your car. Sometimes, the manufacturer will give you a schedule to follow, which makes it even easier to remember to check it.


Leave a comment